Menu Home

Why More Homeowners Are Turning to Local Southern Maryland Movers

When most people think about hiring movers, a national chain is often the first name that comes to mind. It’s familiar, it’s everywhere, and it feels like the safe default choice. But a growing number of homeowners across Southern Maryland are choosing a different path, opting for local, regional movers instead of the big national brands. There are practical reasons behind that shift, and they’re worth understanding before you book your next move.

Regional Familiarity Makes a Real Difference

Southern Maryland isn’t one uniform area. It’s a mix of rural roads in parts of St. Mary’s County, waterfront communities along the Patuxent and Potomac, and fast growing suburban developments throughout Charles and Calvert counties. A company that works this region regularly understands these differences firsthand, from which roads get tricky during a storm to how access works in an older waterfront neighborhood versus a newer subdivision.

This is the core advantage that Southern Maryland movers bring to the table. They’re not learning the area as they go, they already know it, which tends to translate into fewer delays and fewer surprises on moving day.

More Direct Accountability

Moving Company

One thing many homeowners don’t realize until they’ve had a bad experience is that some national moving brands don’t actually own the trucks or employ the crew that shows up at your door. Instead, the job gets handed off to a local agent operating under the national brand’s name, and the level of accountability can vary significantly from one agent to the next.

With a regional company, you’re typically dealing directly with the business that owns the trucks and employs the crew. There’s no layer of subcontracting between you and the people actually handling your belongings, which means if something goes wrong, there’s a clear, direct line of accountability rather than a national customer service line that has to track down which local agent handled your move.

Pricing That Reflects the Local Market

National chains often work from standardized pricing models built for a broad, general market. Regional movers price based on the realities of the area they actually serve: local travel distances, regional market rates, and the kinds of jobs they handle every day. This can lead to pricing that’s more transparent and, in many cases, more competitive than what a national brand quotes for the same job.

It also tends to mean fewer generic add on fees designed for a one size fits all pricing structure. A regional company’s estimate is more likely to reflect what your specific move in your specific area actually requires.

Flexibility for Smaller or Unusual Jobs

National chains often run on centralized scheduling systems that aren’t well suited to smaller jobs, last minute bookings, or moves that don’t fit a standard mold, like relocating between two addresses within the same Southern Maryland community. Regional movers tend to have more flexibility here, since they’re managing their own schedule and can often accommodate requests that a larger, more rigid system would turn away or push weeks out.

If your move is smaller in scope, or you need to book on shorter notice, a regional company is often simply more able to say yes.

Supporting a Local Business

There’s also a community element to this choice. Hiring a regional mover keeps that business within the local economy rather than sending it to a national headquarters elsewhere. It also means you’re working with a company that has a long term reputation to maintain in the community it serves, not a rotating cast of subcontracted agents with less at stake in how any one job goes.

For many homeowners, that combination of local investment and personal accountability is reason enough to choose a regional company over a national name.

The Bottom Line

Regional familiarity, direct accountability, market appropriate pricing, and scheduling flexibility are the practical reasons more Southern Maryland homeowners are choosing local movers over national chains. It’s not just a matter of loyalty to a local business, it’s often simply the better choice for getting a move done well in an area with its own particular geography and logistics.

JDM Motors 101: What Every Import Enthusiast Should Know

Import culture has grown well beyond its original niche corner of the automotive world. What used to be a small, dedicated group of enthusiasts has turned into something far more visible, thanks in large part to social media, video games, and a broader appreciation for cars that were never officially sold outside Japan. For newcomers stepping into this space, though, it can feel like everyone else already knows a shared vocabulary you’re still catching up on.

The Basics of Import Terminology

Getting comfortable with the culture starts with understanding a few foundational terms that come up constantly. Chassis codes are one of the first things newcomers run into, since enthusiasts often refer to cars by their internal code (like S13, JZX100, or EK9) rather than a model name alone. Grey market imports refers to vehicles brought in through legal but non official channels, distinct from vehicles sold through a manufacturer’s authorized dealer network.

The 25 year import rule also comes up often in conversations about JDM motors and vehicle eligibility, referring to the U.S. regulation that allows vehicles 25 years or older to be legally imported and registered, regardless of whether they originally met U.S. safety and emissions standards. This single rule explains why certain older Japanese models suddenly become far more visible on American roads once they cross that age threshold.

Why the Culture Has Grown So Much in Recent Years

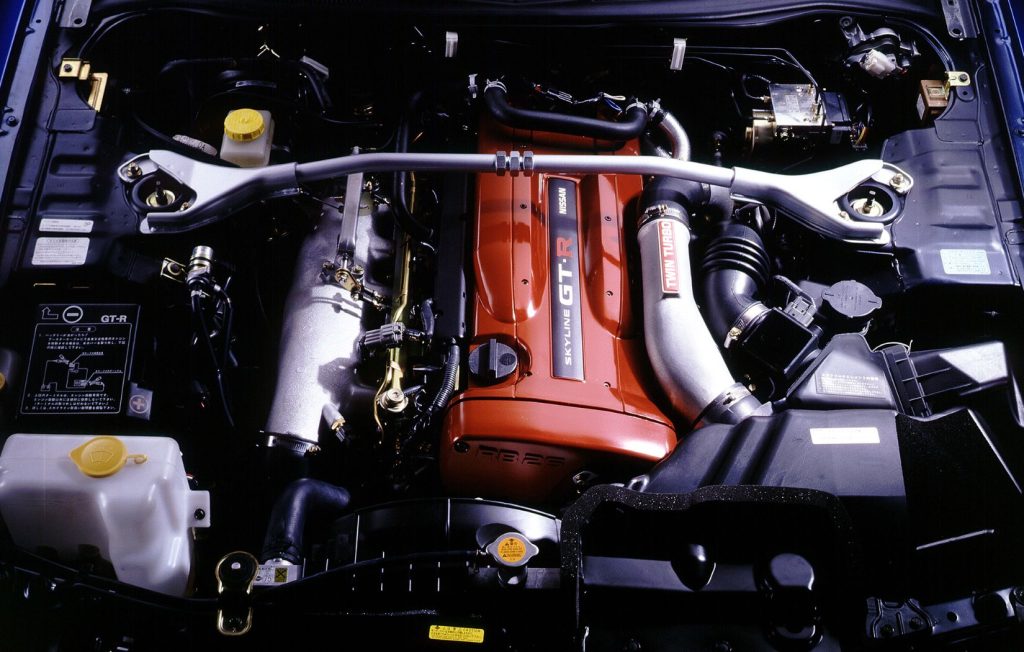
Engine Swaps

A few specific factors have driven the recent surge in visibility. Social media has made it easy for builds, meets, and rare vehicles to reach an audience far beyond the local enthusiast community that would have seen them a decade ago. Racing and driving video games have introduced entire generations to specific models long before they had any real world exposure to them, building brand recognition and demand well ahead of ownership.

The 25 year import rule has also had a compounding effect over time. As more previously unavailable models cross that eligibility threshold each year, the pool of legally importable vehicles keeps expanding, which continues to fuel new interest and availability.

Common Ground Between Enthusiasts and Builders

One of the more interesting aspects of this culture is how it bridges people who will likely never own one of these vehicles with people actively building and modifying them. Car meets bring together casual fans, photographers, and serious builders under the same roof, all drawn by a shared appreciation for the same models. Online communities function similarly, with discussion ranging from casual admiration to deeply technical build advice, often within the same thread.

This overlap is part of what makes the culture feel more welcoming than a lot of other automotive niches. You don’t need to own a build to be part of the conversation.

Getting More Involved as a Newcomer

For anyone looking to move from casual interest to more active involvement, a few starting points tend to work well:

  • Attending a local car meet, even just to observe and talk to people rather than show up with a build of your own.
  • Following reputable community resources and forums rather than relying solely on social media clips, which often lack context or accuracy.
  • Spending time researching before making any ownership or purchasing decisions, since the culture rewards patience far more than impulse.

Take Time to Learn Before You Commit

Getting into import culture doesn’t require rushing straight into ownership or a first build. Understanding the terminology, the history behind the 25 year rule, and the community itself gives newcomers a much stronger foundation before making any real decisions. The enthusiasts who stick with this hobby long term are usually the ones who took the time to learn the culture first, rather than jumping in without that context.

Albury Treetops: The Local Childcare That Doesn’t Treat Families Like “Drop-Offs”

Most childcare centres say they “partner with families.” Plenty of them mean a newsletter and a smile at the door.

Albury Treetops feels different because it behaves like a partnership in the unglamorous moments: the handover, the nap that didn’t happen, the new food your child suddenly refuses, the anxiety spike on a rainy Tuesday. You’re kept in the loop, and the day isn’t run by a rigid script. It’s guided by children and shaped with families.

One-line truth: if your child has a voice, this place actually listens.


 The everyday stuff matters more than the philosophy (but they’ve got both)

You can talk pedagogy all day, but families choose centres for practical reasons: routines that work, communication that doesn’t leave you guessing, educators who aren’t burnt out and cranky by 3pm.

Albury Treetops leans into the unsexy details. Drop-offs and pick-ups are treated like actual transitions, not conveyor-belt moments. Meals and rest aren’t “one-size-fits-all,” and the programme bends when children (and families) need it to. Now, this won’t apply to everyone, but if you’re juggling unpredictable work hours or shared care arrangements, flexibility isn’t a bonus; it’s the difference between coping and constantly apologising.

Also, cleanliness and safety aren’t just compliance checkboxes. They’re the baseline that allows children to take real developmental risks: climbing, negotiating, getting muddy, trying again.


 Hot take: Child-led learning is only real if adults can tolerate a bit of mess

Here’s the thing. “Child-led” is easy to claim and hard to practise, because it requires adults to stop steering the ship every minute. At Albury Treetops, the respectful pedagogy shows up as listening work.

Not performative listening. Actual listening.

Educators track children’s questions, fixations, tiny comments, half-finished drawings, the story that keeps repeating in the home corner. Then they build experiences around those signals while still aligning with developmental outcomes. That balance is the technical trick: staying responsive without becoming chaotic.

In specialist terms, it’s a blend of:

Emergent curriculum (planning from observed interests)

Intentional teaching (nudging skills like language, self-regulation, early numeracy)

Documentation (photos, learning notes, traces of thinking)

And yes, documentation can be overdone in some centres. Here it sounds more like a bridge: families can see what learning looked like, not just be told “they had a good day.”


 A quick stat, because evidence should get a seat at the table

High-quality early childhood education has measurable long-term benefits, particularly for children experiencing disadvantage. One of the most cited syntheses, the OECD’s work on early learning, links quality early education to improved social and cognitive outcomes later in schooling (OECD, Starting Strong series).

Source: https://www.oecd.org/education/school/startingstrong.htm

That doesn’t mean a centre “guarantees” anything (kids aren’t spreadsheets), but it supports what many educators know in their bones: consistent, warm, well-designed early environments matter.


 Inclusion that isn’t just posters on the wall

Some centres have a “multicultural week.” Others build culture and access into the day like it’s normal, because it is.

At Albury Treetops, inclusion shows up in practical systems:

Multilingual communication where possible. Accessible signage. Flexible meeting options. A clear invitation for parents, carers, and kinship networks to contribute, not as a symbolic gesture, but as an input into planning and support. Confidentiality and dignity are treated like non-negotiables (as they should be).

I’ve seen inclusive practice fail when it relies on goodwill alone. Good intentions collapse under time pressure. The centres that do it well build routines that make inclusion easy to sustain, even during busy weeks. This reads closer to that.


 Outdoor learning: not “recess,” not “fresh air time,” but a daily engine for curiosity

A lot of places treat the outdoors as a reward after “real learning.”

Albury Treetops uses it as the learning environment itself. Rocks, puddles, bark, insects, shadows, seasonal changes, it’s all curriculum material if educators know how to frame it.

You’ll see outdoor moments tied to actual developmental domains:

Science thinking: observing, predicting, testing (Why do leaves change? Where does water go?)

Language: describing textures, negotiating rules, telling stories about what they found

Math foundations: comparing size, counting, pattern spotting

Risk competence: safe risk-taking with supervision, not fear-driven restriction

And because it’s habitual, not a once-a-week nature activity, children build confidence through repetition. They get sturdy.


 Communication that respects your time (and your nerves)

Look, families don’t need essays every day. They need clarity.

Albury Treetops leans on regular, transparent updates: short summaries, visual snapshots, notes about milestones and interests, and quick channels for questions. The point isn’t constant contact; it’s reducing the mental load of wondering.

Good communication does something subtle: it stops small concerns from becoming big ones. You can course-correct early, sleep changes, behaviour shifts, new sensitivities, because you’re actually informed.


 Play-based learning, but make it intentional

Play-based learning can be brilliant. It can also be lazy, when adults confuse “free play” with “no plan.” The best centres treat play as a vehicle, not a babysitting strategy.

At Albury Treetops, imaginative environments (role play zones, themed setups, open-ended materials) are used to build:

Narrative skills. Collaboration. Problem-solving. Persistence. Language. Planning.

In my experience, the giveaway is how educators intervene. Do they take over? Do they disappear? Or do they observe, wait, then extend at exactly the right moment with a question, a prop, a prompt, a gentle constraint? That last one is where learning accelerates.

Sometimes it’s as small as: “What do you think will happen if we add water?”

Sometimes it’s bigger: “How can everyone have a turn being the doctor?”


 The staff piece: professional growth isn’t optional if you want consistent quality

Centres don’t run on mission statements. They run on educator capability and consistency.

Albury Treetops puts weight on reflective practice, peer coaching, and structured feedback, plus community connections that aren’t just token visits. When staff development is embedded, you get fewer random shifts in expectations between rooms, fewer “depends who you get that day” experiences, and more coherent practice across the centre.

Community-minded programming also sends a message children understand instantly: learning doesn’t live in a room. It connects to people, places, and local relationships.


 So what actually makes it stand out locally?

It’s the combination that’s hard to fake:

A respectful, child-led approach that still has structure.

Outdoor learning that’s daily and purposeful.

Inclusion built into systems, not slogans.

Communication that’s steady, not sporadic.

Educators who keep sharpening their practice.

Not every family wants that style, and that’s fine. But if you do, Albury Treetops reads like a centre designed around real life, not just a polished brochure version of it.

How to Convert JPG or PNG to Vector Files (Free & Paid Methods)

So, you’ve got a JPG or PNG and want to turn it into a snazzy, scalable vector file? It’s not magic (even though it sometimes feels like it). Whether you’re using free tools or something more pro, the basic steps are:

  1. Prep your image (make sure it’s clean and crisp)
  2. Trace (either by hand or autotrace)
  3. Tidy up (edit those paths so everything’s smooth!)
  4. Export (choose the right vector format for your needs)

Let’s break it all down.

Why Your Vector Format Choice Matters

Picking a vector format isn’t just about personal taste. It actually affects:

 Scalability: Will your logo look good on a billboard and a business card?

 File size: Some formats are leaner than others.

 Editability: Want to tweak colors or shapes later? Some formats make it easier.

Popular formats:

 SVG: Great for web, widely supported.

 EPS: Good for print, plays nice with older tools.

 AI: Perfect if you’re in the Adobe ecosystem.

Pro tip: If you’re sharing files with others, make sure you’re ALL using the same format. Less chance of “wait, why does this look weird on my screen?” If you’re not sure exactly what is a vector file, it’s worth a quick read to understand why these formats matter.

Prepping Your Raster Image for Vector Magic

Before you start tracing, do your future self a favor by cleaning up your image.

  1. Check Image Resolution

 High resolution = better tracing

 If your source image is tiny or pixelated, your vectors will look rough.

 If needed, upsize the image but gently, so things don’t get super blurry.

  1. Clean Up Edges

 Zoom in (like, *way* in 500% is not too much) and erase stray or jagged pixels.

 Use a soft brush to smooth out corners and curves.

 Keep the important details! Don’t oversmooth.

  1. Remove Compression Artifacts

 JPEGs especially can have weird blocks or color blotches around edges.

 Try a mild denoise or median filter to smooth these out.

 If you still see color gunk, desaturate those areas just a bit.

Manual Tracing: Free Tools, Full Control

If you want the most control (and don’t mind a little extra work), manual tracing is your friend. Free software like Inkscape or Vectornator can do the trick.

How to do it:

 Open your image in the vector editor.

 Use the Pen or Pencil tool to trace around the shapes, dropping anchor points at corners or curves.

 Work in small segments makes it easier to fix mistakes later.

 Snap to the pixel grid for sharp lines.

 Save versions as you go, so you can always jump back if needed.

Tips:

 Disable antialiasing for pixelprecise tracing.

 Zoom in/out to check your lines against the original.

AutoTracing: Free Options & Handy Tips

Not up for tracing every curve by hand? Autotrace tools are a lifesaver, but results will vary.

Popular free options:

 Inkscape (Path > Trace Bitmap)

 Online tools like vectorizer.io

What to watch out for:

 Simple logos or line art: Usually trace well.

 Photos or detailed images: Expect to do some cleanup after autotracing.

 Check output formats: Make sure you can save as SVG, EPS, or PDF.

 Batch processing: Nice if you’ve got a lot of files.

Heads up: Autotracing can sometimes create weird artifacts (like wobbly lines or color bleeding), so you might need to tidy up in your vector editor.

Paid Software: Smoother Workflows, More Features

If you have access to Illustrator, CorelDRAW, or Affinity Designer, you get more control and automation.

Typical workflow:

 Import your cleanedup raster.

 Choose a tracing preset (logo, photo, sketch, etc.)

 Tweak settings: edge detection, smoothing, corner sharpness, color count.

 Preview, then refine any problem areas manually.

 Export as your chosen vector format (SVG, EPS, AI, etc.)

Pro tip: Save your favorite settings as presets for next time!

Exporting & Optimizing Vectors for Different Uses

Getting your vector out of the software is just as important as making it.

For web: Save as SVG, use sRGB colors.

For print: EPS or PDF, use CMYK colors, embed fonts if needed.

Legacy workflows: Sometimes only EPS will do.

Adobe workflows: AI format keeps everything editable.

Optimize by:

 Simplifying paths (no need for 1,000 anchor points on a simple curve)

 Removing hidden/invisible layers

 Naming your files and layers clearly

And always check with your printer, web developer, or client to make sure your export settings match their needs!

Common Pitfalls & Quick Fixes

 Blurry or jagged edges? Go back and check image resolution and edge cleanup.

 Weird colors or artifacts? Look for leftover compression junk in the original.

 Too many anchor points? Simplify paths in your vector editor.

 Not scalable or editable? Doublecheck your export format.

If autotracing looks bad, don’t be afraid to switch to manual tracing for problem areas. Sometimes a hybrid approach is best!

Final Thoughts

Turning a JPG or PNG into a beautiful, flexible vector is totally doable just takes a little prep, the right tools, and some patience. Clean up those images, pick your tracing method, and always doublecheck your exports. Your logos, illustrations, and designs will be ready to scale *anywhere*.